Widening Drums with Harmonizers and Doublers

In the last two articles, I explained how you can get a wider drum sound by simply using panning, and I explained how manipulating frequency (pitch), timing (phase), and amplitude (volume) differently in the left and right channels can make your drums seem wider. But what specific plugins can you use to apply these concepts in your mixes, and how exactly do you use them?
There are a variety of options. One plugin that is very useful for widening is called a harmonizer. Harmonizers are a great place to start when learning about widening plugins. They offer you direct control over the frequency, timing, and amplitude of audio signals in order to create width. And they allow you to create widening effects that are very subtle, very drastic, and everywhere in between. They’re most useful for mono audio signals, like drums. But they can be used on all kinds of instruments.
What’s A Harmonizer?
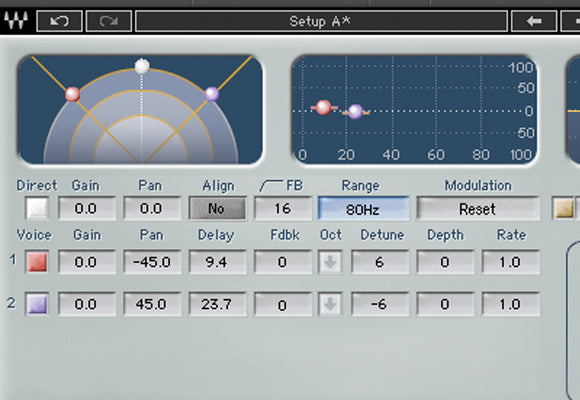
A harmonizer is a plugin that creates two (or more) duplicates of the audio that you send into it, and pans the duplicate audio signals around the stereo field (left and right).

However, as you saw if you did the experiment I suggested in last month’s article, panning the exact same audio signal around the stereo field won’t have any effect on how wide the audio signal sounds. So harmonizers have additional features that allow you to manipulate the frequency, timing, and amplitude of the duplicate sounds that you pan.
Harmonizers have pitch shifters, which allow you to change the pitch of the audio up or down in very small increments. They also have separate delays for each duplicate audio track you create, so that you can subtly change the timing of each duplicate audio track. And they typically contain volume faders, so that you can change the volume of each duplicate.
These tools allow you to simulate the differences in frequency, timing, and amplitude between two different hits on the same drum. If you use different pitch shifting, delay, and/or amplitude settings on each duplicate of your drum sound and then pan them around, you will be able to hear each duplicate as a separate sound, and your drums will sound wider.
Most harmonizers also include pan controls for each duplicate audio channel, so you can control where your widened signal goes. (Some harmonizers force you to keep your duplicates panned hard left and right.) And harmonizers often contain more advanced controls as well that allow you to manipulate the sound in other ways.
Harmonizer Plugins
Some examples of harmonizer plugins are Waves Doubler, the Eventide H3000 Factory Harmonizer, and Audio Damage Discord3.
There are also more boutique harmonizer plugins out there that give you less control over the specifics of what happens to your sound, but allow you to achieve one specific kind of widening vibe very quickly. Examples of these plugins are the free QuikQuak Upstereo plugin and SoundToys Microshift, which emulates an Eventide H3000 harmonizer.
In a pinch, you can also use any stereo delay plugin as a harmonizer. You can set one delay on the left channel and a different one on the right (see below for suggested delay settings). You’ll want to keep the feedback at 0%, and turn the wet/dry knob to around 5 – 25% if you’re using it as an insert plugin, 100% wet if you’re using it on an aux bus. A delay plugin won’t allow you to manipulate the pitch or volume of your duplicate audio tracks, but the effect will be similar anyway.
Harmonizer Settings
For a traditional harmonizing effect, it’s best to keep the changes between the duplicates small enough so that all the duplicates are still recognizable as the same sound. It usually doesn’t take much to get a widening effect. Let’s say you’re using two duplicate drum sounds, one panned left and one panned right, in addition to the original dry drum sound. Try shifting one channel up 5 – 10 cents and the other one down by the same amount.
Then try delaying one channel 7 – 15 milliseconds and the other 20 – 30 milliseconds (it’s best to stay under 35 milliseconds, because that's roughly the cutoff where the human ear can detect two separate sounds. If the delay is under about 35 milliseconds, it sounds like one sound blurred a bit.). And keep the volumes the same for each channel so your stereo field is balanced.
Besides these guidelines, your harmonizer plugin probably has good presets that you can try too.
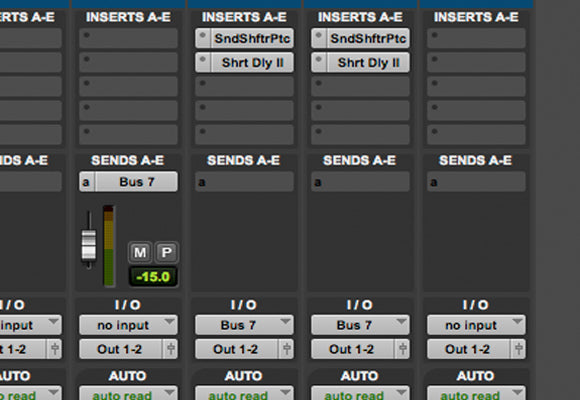
You can use a harmonizer as an insert plugin, in which case you should leave the dry, center signal untouched (unless you want a really wide effect). Or, my preference is to use a harmonizer as a send effect on an aux bus, setting it at 100% wet (muting the center, dry signal). Try a send level of -10 to -15 dB for an effect that isn’t super noticeable, but adds a nice touch of width that can make all the difference.
Applications
Harmonizers are great for drum machine snares or claps if they feel a little too narrow and small. They can also be great for percussion that you want to feel more ambient. Just a little bit of widening on percussion can weaken the dead-center image of the sound, pushing it a little into the background and out-of-focus. That way you feel the percussion in the vibe of your song, but it doesn’t get in the way of your more important instruments. You can also try harmonizers on cymbals, shakers, and other percussion.
Make Your Own Harmonizer
If you don’t have a harmonizer plugin, you can create your own harmonizer effect pretty easily with stock plugins in your DAW. Send your audio signal to a bus, then create two aux tracks with that bus set as their input. Pan one of the tracks hard left, and the other hard right. (Or you can pan closer to the center if you don’t want to widen that much.) Then insert pitch shifting plugins and delay plugins on each track, and set them using settings like the ones I mentioned above.

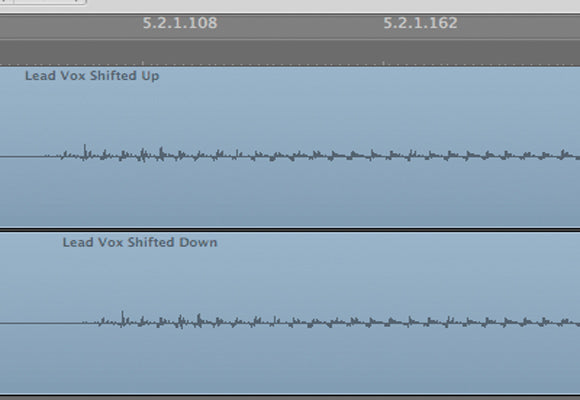
Or you could avoid using plugins altogether, if you know exactly how much pitch shift you want to use. Create two duplicate audio tracks, and copy and paste your lead vocals to the two new tracks. Pan one hard left and one hard right. Use offline pitch shifting or your DAW’s audio editor to shift the pitch of one of the tracks up and one down the same amount (5 – 10 cents is good) while keeping the timing and length of the track the same. Then nudge the audio regions to the right a little bit to get different delays on each of them, both below about 35 ms.

I'll probably take a break now from writing about widening, at least for a little while. But later we’ll have more articles about how you can use effects like phasers, chorus, flangers, delay, reverb, and even simple EQ, compression, and distortion to widen your drum sounds. I’ll also talk about some of the pitfalls you can run into when widening your drum sounds—what some of the tradeoffs are, and what to avoid.
I know some of the descriptions in this article might have been confusing. Please let me know if I can clarify anything by asking in the comments below. Thanks for reading!
Next →
← Previous


